

Sigh. So close and yet so far. Maybe you're right in that it'll be a race -- albeit a slow one -- between Darimo and 3T at this point as to who'll actually make a lighter aftermarket post available for the 3T Strada....takolino wrote: ↑Tue Sep 15, 2020 9:12 pmI got more detail from Dan at 3T.
"The difference in the posts comes from the bevel on the back edges of the post. It will not be possible nor is it recommended by 3T to sand the post to fit the dimensions of the Strada. Doing so could compromise the frameset and would void the warranty.
With that being said, we are looking at producing this post for the Strada but with production backlogs, it is proving difficult currently.
We hope to have a solution in the coming months."
3T Strada sub 6kg goal with cable disc and mechanical shifting
Moderators: MrCurrieinahurry, maxim809, Moderator Team


Visit starbike.com Online Retailer for HighEnd cycling components
Great Prices ✓ Broad Selection ✓ Worldwide Delivery ✓
www.starbike.com

I’ll measure the D asap.
As far as Darimo, would it help if they had another order for one? I’d sign up for that.
As far as Darimo, would it help if they had another order for one? I’d sign up for that.
Height of “D”: 20.2mm

Width of “D”: 35.47mm


Width of “D”: 35.47mm

Hey MattMay, thanks for taking the measurements.
My Strada post measures 19.7mm x 34.8mm so around quarter millimeter smaller all around. This sort of confirms what was stated earlier, sanding off a bit of the paint will probably make it fit. That said, if you were to get a Darimo for an Exploro, you may have to add material which may be a bit more challenging. Maybe a heavy coat of 2 part paint would do it.
I've been sending Darimo an email about once a month just because I'm impatient but I don't know if that makes them go any faster. I'm sure more interest from new customers could help. They are not taking orders yet but an inquiry couldn't hurt.
I've ordered material to do the hacked seatpost. I can share a more detailed process of the hack when I do it in case ppl are interested. I hope to have everything needed by early next week. 3T, Darimo, here I come!
So the pads I ordered for the GT from AlphaCycling came in. They do fit and are pretty light. I also got the aluminum backed pads for the rear F1 brakes and they also fit. They are from EOOZ on Aliexpress. They are spec'd for Shimano M975/Saint M800.
By the way, the aftermarket springs that came with the pads are not strong enough to retract the calipers and the brakes rub. I put the OEM springs back on and they do the job.
Replacing the original Juintech steel back pads with these aluminum back pads net out to a saving of 22.4g. Not saving as much as Klaster_1's RX4 but still significant. I'll update if I have any issues with these pads.
- Attachments
-
- aluminum back GT-f pads (front)
-
- OEM GT-f pads
-
- aluminum back F1 pads (rear)
-
- OEM F1 pads

Same here, with Cooma springs the pads don't sit parallel and rub the rotor regardless of how much you adjust the pistons, had to use stock Hope pad springs.
The seatpost hack is done.
Final weight for a medium seatpost shortened by about 16mm (because of the hack) came to 129.7g. I'm very happy with the results. I saved over 100g with this mod. At this weight, I'm not sure I'll get the Darimo. We'll see how much lighter it will be. I don't think the new 3T post will be lighter. I just need to ride the mod and see if it will hold up.
TBH, this was a bit more work than anticipated, mostly because I ended up modding two seatposts. First one was meant to be practice on a xs post I bought cheap on ebay. The second one would be the real deal. But in the process of doing the practice seatpost, I made some discoveries and ended up changing the design for the better. Long story short, I have two modded seatposts. The first one is virtually unusable because it's way too short, but the second one came out pretty good. The carbon wrap ended up being unnecessary but there was a bit more cutting, drilling and carving work on the post. This hack would be much easier if you have access to a machine shop. I ended up using a drill press, an edger, a grinder and some files. You need to remove a lot of solid carbon fiber. Pictures below will tell the story better.
working with carbon fiber required a lot of prep.

shrink tape makes for a much tighter layup.

Had to make a jig for precise work.

Carbide hole saw $24

Cutting work done

Finished practice seatpost

Final weight for a medium seatpost shortened by about 16mm (because of the hack) came to 129.7g. I'm very happy with the results. I saved over 100g with this mod. At this weight, I'm not sure I'll get the Darimo. We'll see how much lighter it will be. I don't think the new 3T post will be lighter. I just need to ride the mod and see if it will hold up.
TBH, this was a bit more work than anticipated, mostly because I ended up modding two seatposts. First one was meant to be practice on a xs post I bought cheap on ebay. The second one would be the real deal. But in the process of doing the practice seatpost, I made some discoveries and ended up changing the design for the better. Long story short, I have two modded seatposts. The first one is virtually unusable because it's way too short, but the second one came out pretty good. The carbon wrap ended up being unnecessary but there was a bit more cutting, drilling and carving work on the post. This hack would be much easier if you have access to a machine shop. I ended up using a drill press, an edger, a grinder and some files. You need to remove a lot of solid carbon fiber. Pictures below will tell the story better.
working with carbon fiber required a lot of prep.
shrink tape makes for a much tighter layup.
Had to make a jig for precise work.
Carbide hole saw $24
Cutting work done
Finished practice seatpost
I did the practice seatpost over the weekend. In the process, I discovered that the top of the seatpost was solid carbon fiber and only the conical clamping surface was aluminum. This got me thinking about not wrapping carbon and using the solid part of the seatpost. This meant that I'd have to remove a lot more carbonfiber to lighten the post but It would look cleaner. I think the results will speak for itself.
I'll post some pictures of the finished post tomorrow.
I'll post some pictures of the finished post tomorrow.
What an awesome mod! Instead of a complete Darimo seatpost, you can order a loop lock system and save a couple grams more. Did you use a rod or a tube? Hard to see on the photos.
Nice work! Wish I had all those cool tools and knew how to use them.
3T confirms late October for new post btw.
3T confirms late October for new post btw.
Thanks!
I located the anchor pin too close to the rail for the Darimo loop lock system. I was trying to minimize the clamp bolt length to save weight and for aesthetic reasons.
I used an 8mm diameter, 6.8mm id stainless steel tube. It's thinner than typical but I've seen it used and it works well for the narrower post. Also lighter than the typical solid aluminum rods.
Thanks! Which seatpost? The RaceMax or the Strada?
The Racemax, the one backwards compatible to Exploro.


Visit starbike.com Online Retailer for HighEnd cycling components
Great Prices ✓ Broad Selection ✓ Worldwide Delivery ✓
www.starbike.com
I'll briefly share my seatpost modding experience. As I posted earlier, I did a practice version and was able to refine my process. First, I had to fill the big hole with resin for the hole saw pilot hole. Then a lot of measuring and marking, then drilling, cutting and filing. There's a bit of metal work to make the anchor pin that holds the anchor bolts. I was able to finish the mod in two evenings.
Filled the hole with resin left over from the earlier carbon layup.

Pilot hole drilled

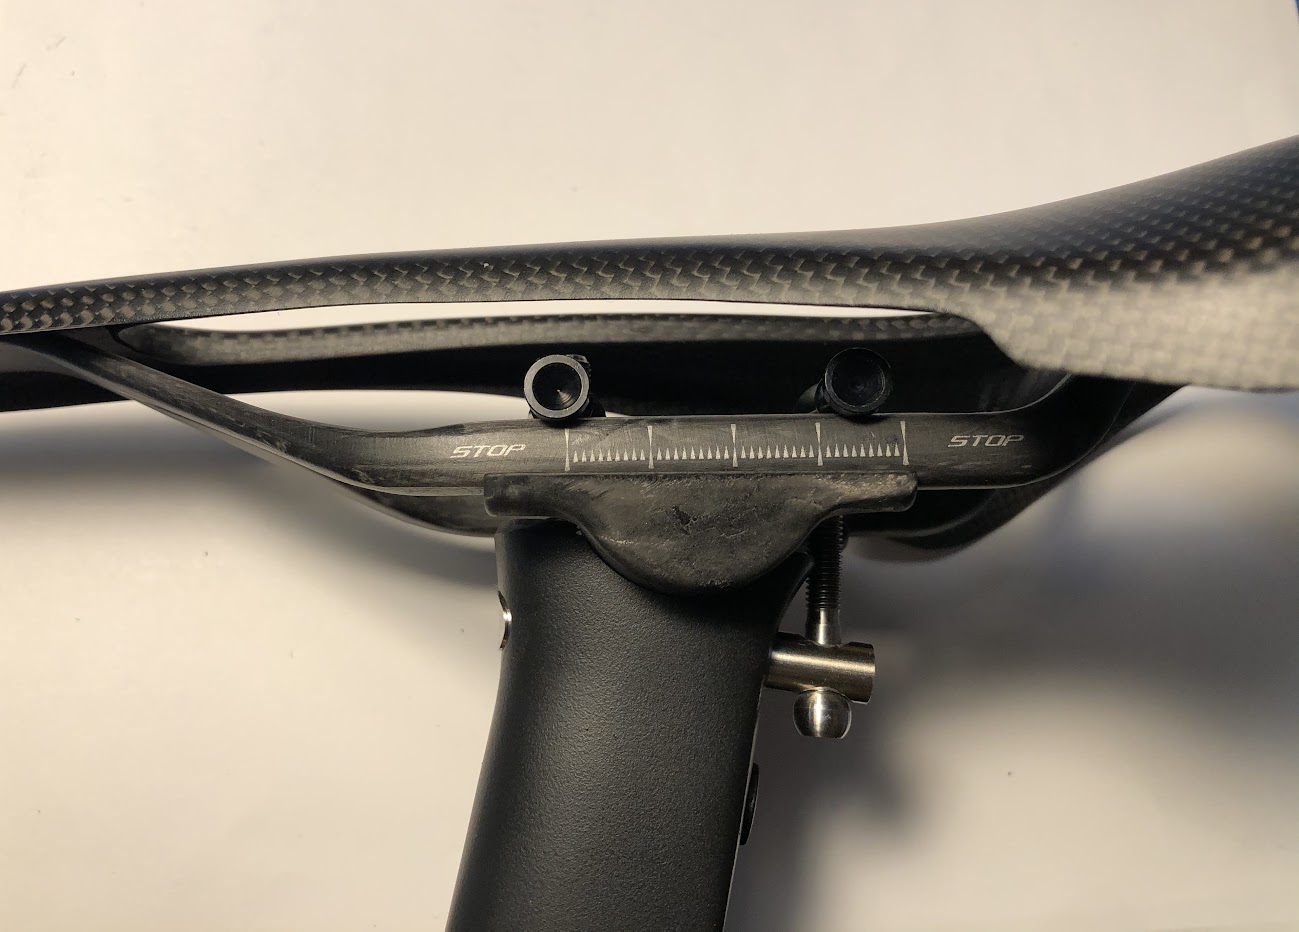
Drilling work done. Notice new location of top of post. Not much shorter.

Had to get creative with tools to carve out the solid carbon fiber. About 4cm solid.

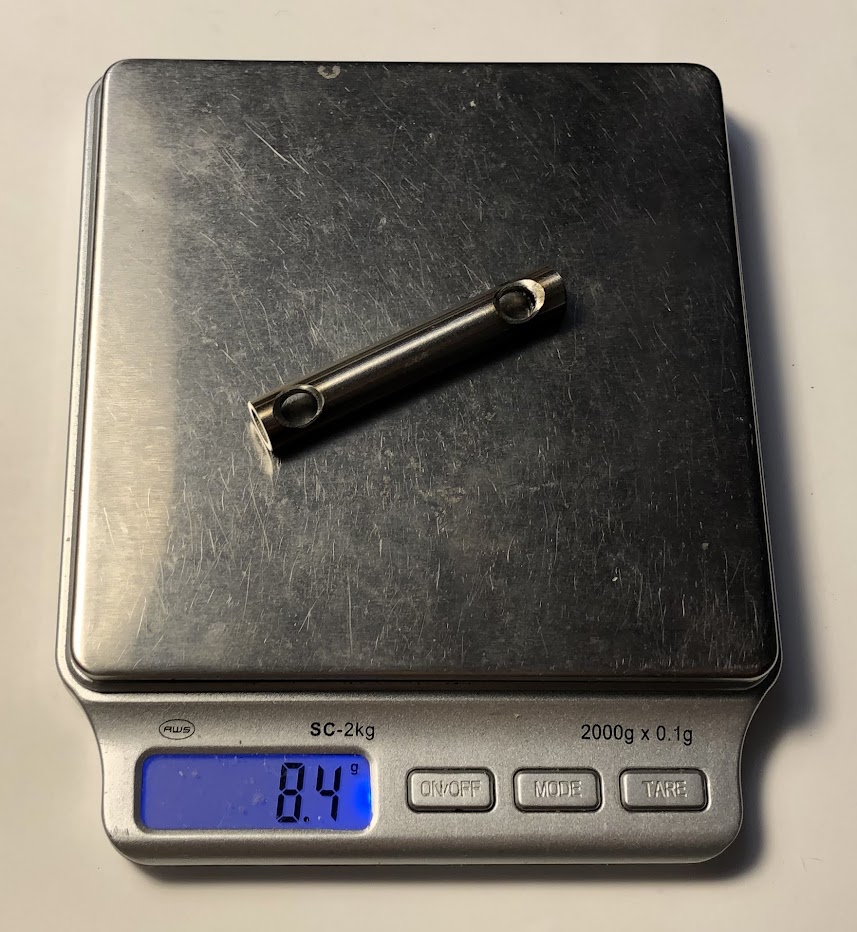
Stainless steel is very hard to cut. Used abrasive bits and a cheap masonry drill bit for the holes. Used a dremel cutoff wheel to cut the end off. Finished it with a bit of filing.

Quite light for a stainless steel part. Hollow tube makes it lighter than the aluminum pins typically used on zero setback seatposts.
I placed the front bolt inside the seatpost to get a bit of setback. The pin is angled to hold it in place when tightened.
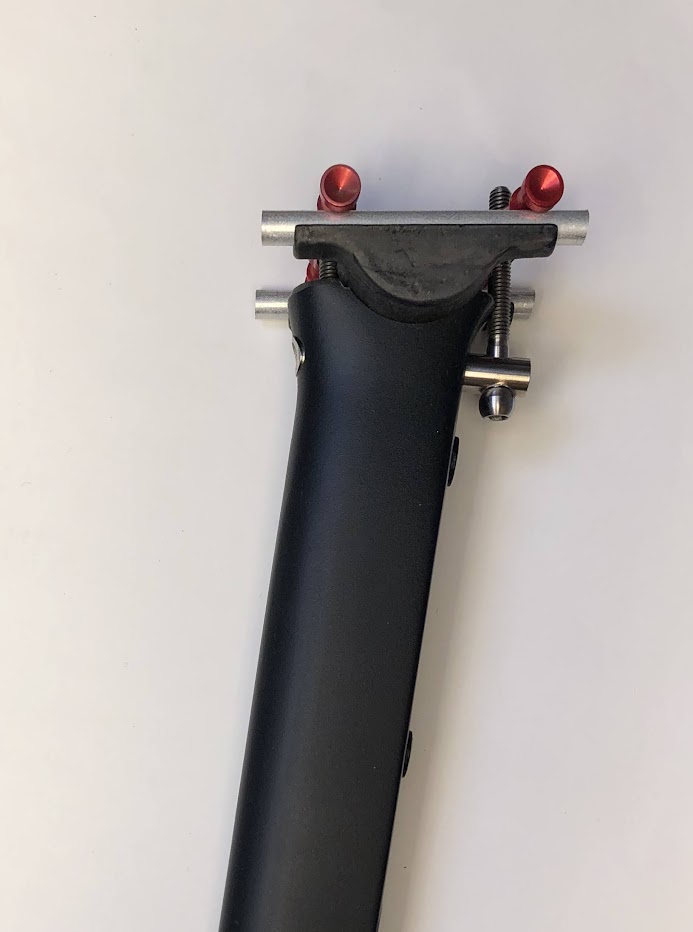
Two versions. Left is practice on a xs seatpost. On second try, I used the upper portion of the post with more room for setback and space for the front bolt inside.
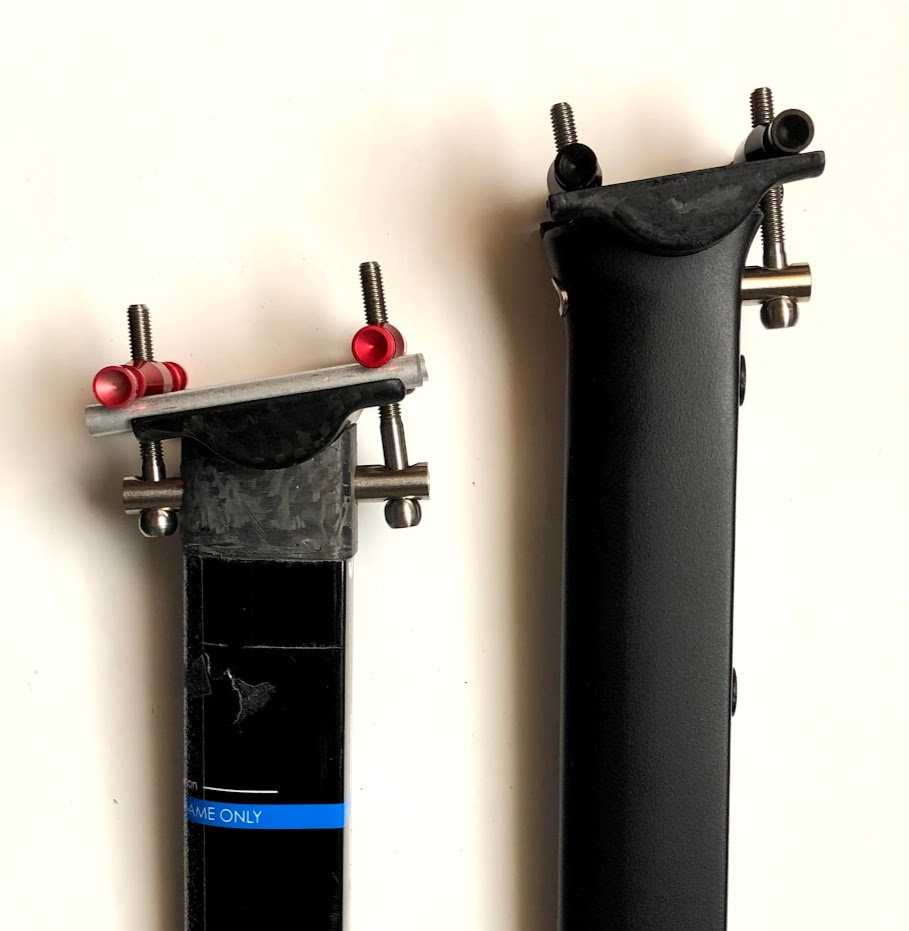
What's left of the Charlie seatpost.

Filled the hole with resin left over from the earlier carbon layup.
Pilot hole drilled
Drilling work done. Notice new location of top of post. Not much shorter.
Had to get creative with tools to carve out the solid carbon fiber. About 4cm solid.
Stainless steel is very hard to cut. Used abrasive bits and a cheap masonry drill bit for the holes. Used a dremel cutoff wheel to cut the end off. Finished it with a bit of filing.
Quite light for a stainless steel part. Hollow tube makes it lighter than the aluminum pins typically used on zero setback seatposts.
I placed the front bolt inside the seatpost to get a bit of setback. The pin is angled to hold it in place when tightened.
Two versions. Left is practice on a xs seatpost. On second try, I used the upper portion of the post with more room for setback and space for the front bolt inside.
What's left of the Charlie seatpost.


