


I’ve been riding it rather than modifying it. I had an idea of building a drink reservoir inside the frame cavity, similar to Specialized I think? I need to post some final pics in the gallery. Much of the groupset I am intending to use on the Scott build leaving my Y Foil redundant. Time to sell maybe!
Early Scott Addict SL Custom Build
Moderators: MrCurrieinahurry, maxim809, Moderator Team


Visit starbike.com Online Retailer for HighEnd cycling components
Great Prices ✓ Broad Selection ✓ Worldwide Delivery ✓
www.starbike.com
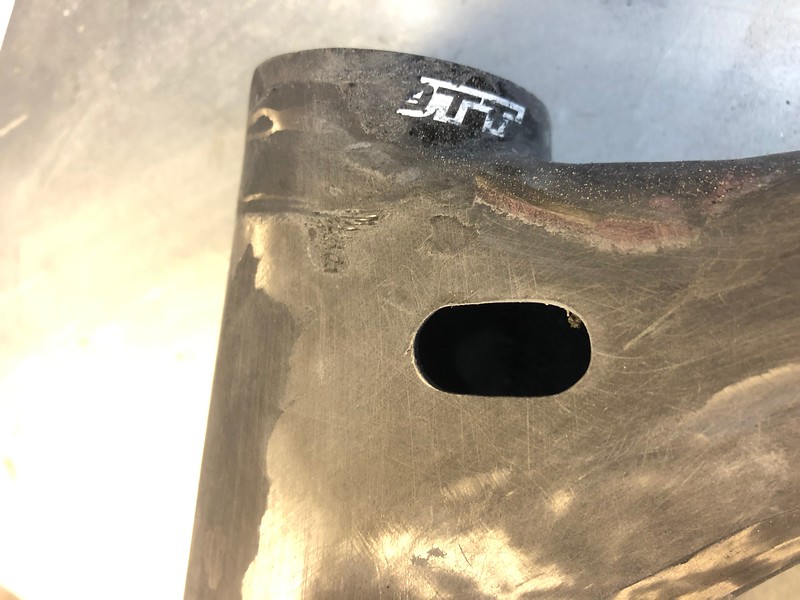
Start of rear brake internal cable routing.
Marked up and cut holes for cable guides, bonded into position however I will laminate with additional carbon to fully secure them. Note they are coated in paint to avoid any alloy and carbon reaction issues.... more pics to follow when they are laminated into place.


Marked up and cut holes for cable guides, bonded into position however I will laminate with additional carbon to fully secure them. Note they are coated in paint to avoid any alloy and carbon reaction issues.... more pics to follow when they are laminated into place.
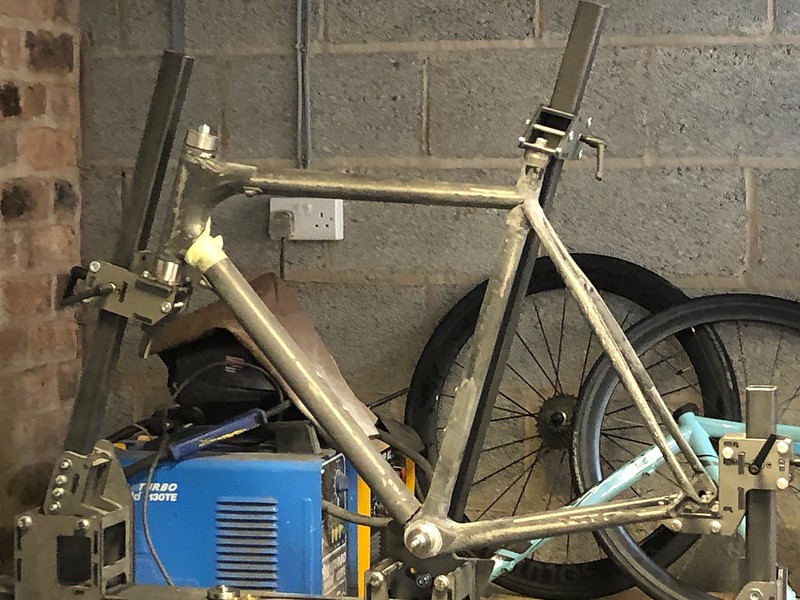
Top tube now shortened in length and butted up to seat tube ready for re-laminating with fresh carbon fibre much the same as Scott when originally manufacturing this frame.

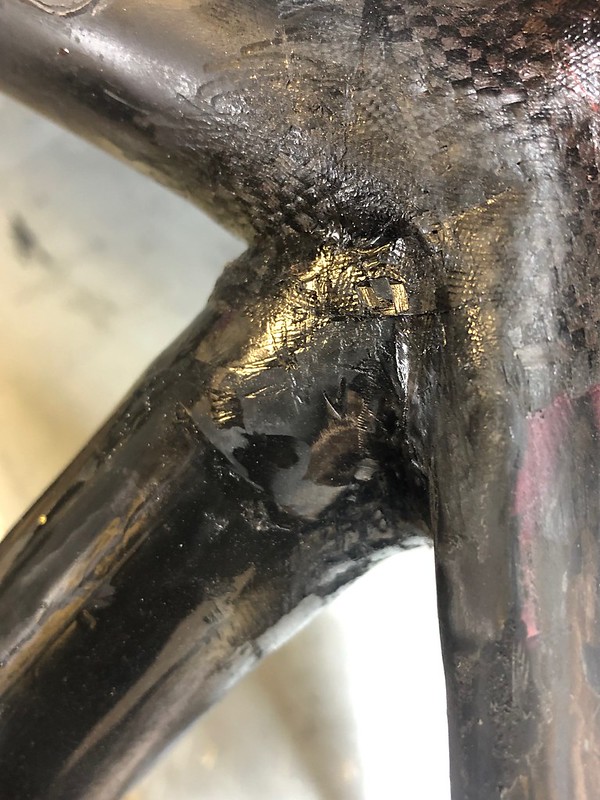
That red is the original epoxy bonding applied by Scott when piecing the frame sections togther prior to adding additional carbon fibre.


Downtube and headtube junction. Material has been 'thinned' out to feather the joint. New carbon will be laminated internally, this will extend inside the downtube approx 40mm passed the join, also extend around the lower headtube and lower head bearing seat.

An internal bag was inflated to compress new carbon into existing, this bagging will not stick to new carbon and so can be pulled out when cured.


That red is the original epoxy bonding applied by Scott when piecing the frame sections togther prior to adding additional carbon fibre.
Downtube and headtube junction. Material has been 'thinned' out to feather the joint. New carbon will be laminated internally, this will extend inside the downtube approx 40mm passed the join, also extend around the lower headtube and lower head bearing seat.
An internal bag was inflated to compress new carbon into existing, this bagging will not stick to new carbon and so can be pulled out when cured.
Due to the jig having a theaded bolt clamping headtube in place I had to temprarly apply carbon fibre to external joints of headtube/downtube, also at this stage laminated toptube/seat tube areas. This allowed me to exrtact frame from jig without destryoing upsetting the geomtery. Internal carbon using the inflatable bag was then laminated into place (above pics)


English threaded bottom bracket was to be removed in favour of a PF30 party to save weight and also because I have a Sram Red PF30 chainset ready to fit.

More of that red epoxy holding the alloy bb in place.

Frame dremmelled out to accept the larger diameter PF30 inner sleave

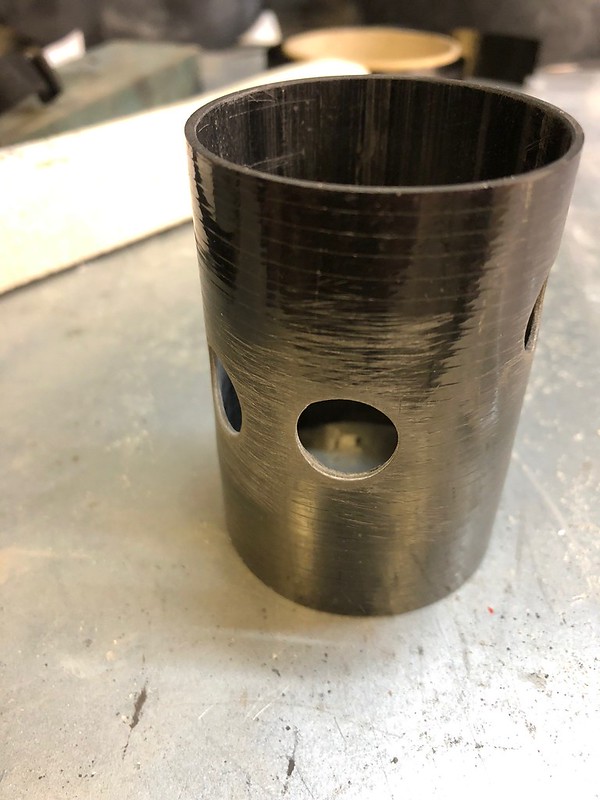
PF30 carbon inner sleave ready for bonding into the frame. Those holes allow Di2 cabling to run from downtube, seattube and rear chainstay for rear mech.
PF30 sleave and rfame then went back in the jig and laminated in place.

More of that red epoxy holding the alloy bb in place.
Frame dremmelled out to accept the larger diameter PF30 inner sleave
PF30 carbon inner sleave ready for bonding into the frame. Those holes allow Di2 cabling to run from downtube, seattube and rear chainstay for rear mech.
PF30 sleave and rfame then went back in the jig and laminated in place.

Now all external cable stops are removed I'm running Di2 wiring internally with an internal seat tube battery.
Rear mech cable exits neatly via a hole drilled directly though the end of the dropout/chainstay male female joint.
This area is solid carbon before opening out into the chainstay void. There is still enough internal wall thickness to give adequate strength.

Cabling then routes through PF30 sleave up seat tube and down tube.

Rear mech cable exits neatly via a hole drilled directly though the end of the dropout/chainstay male female joint.
This area is solid carbon before opening out into the chainstay void. There is still enough internal wall thickness to give adequate strength.
Cabling then routes through PF30 sleave up seat tube and down tube.
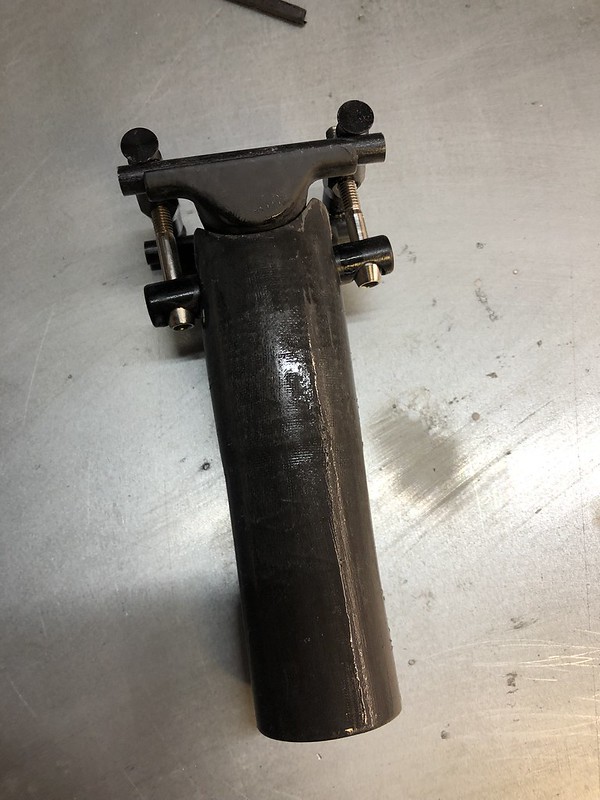
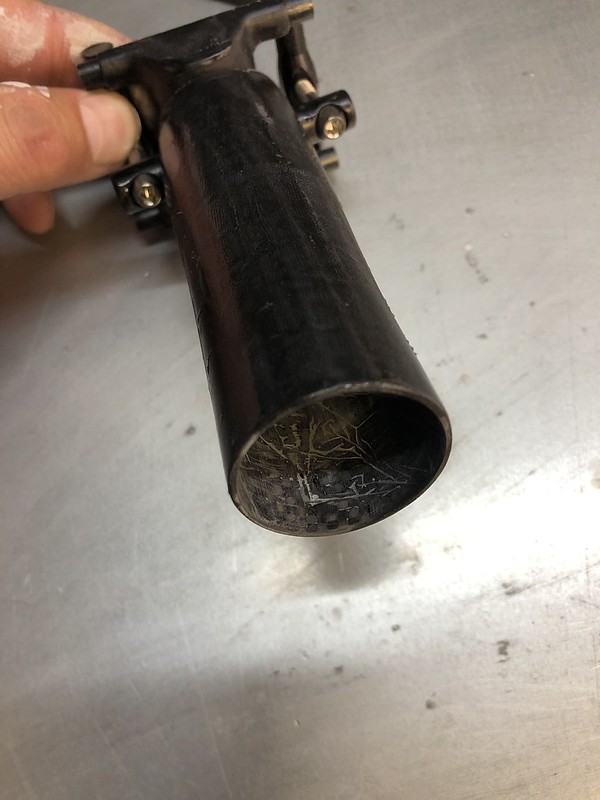
This frame now sports an ISP (integrated seat post) and so I have fabricated a lightweight carbon seatmast topper.
This will include a carbon clamp and be finished in high gloss with a custom paint design... more about the paintwork to follow!

This will include a carbon clamp and be finished in high gloss with a custom paint design... more about the paintwork to follow!
There was some existing toptube damge in the form of a hairline crack in the outer carbon layers. Probbaly caused by handlebars spinning round and striking the tube. I have added a couple of strips of uni-directional carbon to each side to hopefully avoid future damage and inscrease strength around the area, these Scott frames are so fragile!!
Many many many hours later and its finally starting to take shape, outer carbon layers are now complete. I wanted to give it a raw look and leave weave on full view. Factory finished frames have black airbrushed areas around all joints, personally I think its a shame to hide all that carbon weave and would rather the sun shows it off as light bounces around. I have added a few pieces on the internal cable guide openings for strength and easthetically.
All new carbon work is laid up by hand and so does require some surface finishing, at this stage it has been sealed with gloss clear coat, this will be flatted back, further coat appplied, flatted, more applied, flatted and just keep going until its perfectly smooth.


All new carbon work is laid up by hand and so does require some surface finishing, at this stage it has been sealed with gloss clear coat, this will be flatted back, further coat appplied, flatted, more applied, flatted and just keep going until its perfectly smooth.
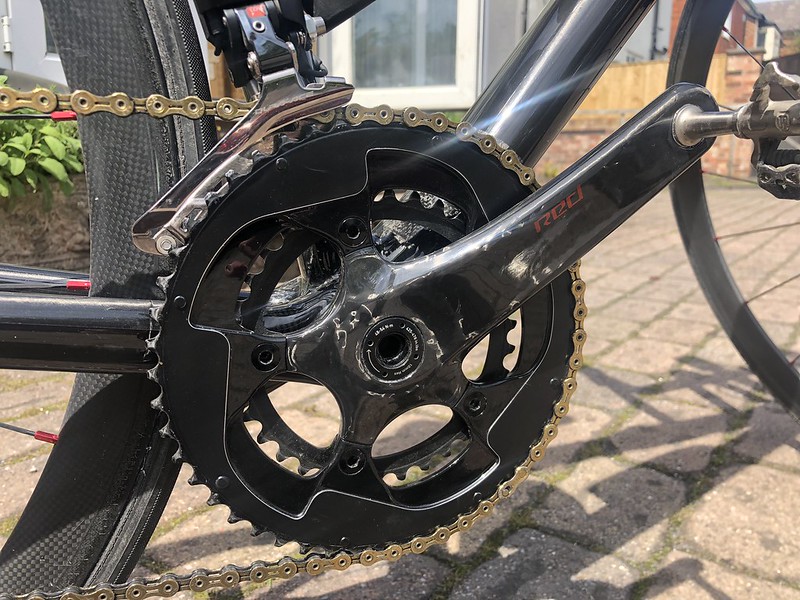
My existing Sram Red chainset although low mileage is looking tatty, I had previously removed all branding and clear coat to go for a stealth look but now feel it looks rather bland.

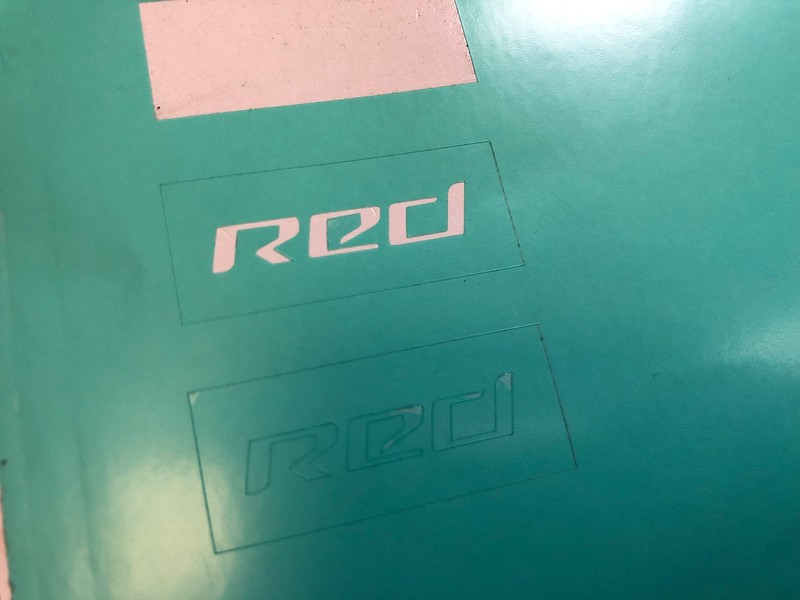
Re-laquered the crank arms with 2k high gloss laquer, then produced Sram Red logo artwork (maybe this exists on line but I couldnt find a vector version).

Artwork was then cut on a plotter to create a stencil
Finally airbrushed onto the crank arm, silver first followed by a candy red.

Cranks then given several more coats of 2k clear laquer.
Outer chainring was repainted in black to clean up existing chips and scratches, raised section was sanded back to create a bare steel lip before outer surface sprayed with a satin 2k clear and inner section with gloss 2k clear. I quite like the effect rather than just a single satin or gloss finish.
Re-laquered the crank arms with 2k high gloss laquer, then produced Sram Red logo artwork (maybe this exists on line but I couldnt find a vector version).
Artwork was then cut on a plotter to create a stencil
Finally airbrushed onto the crank arm, silver first followed by a candy red.
Cranks then given several more coats of 2k clear laquer.
Outer chainring was repainted in black to clean up existing chips and scratches, raised section was sanded back to create a bare steel lip before outer surface sprayed with a satin 2k clear and inner section with gloss 2k clear. I quite like the effect rather than just a single satin or gloss finish.
Visit starbike.com Online Retailer for HighEnd cycling components
Great Prices ✓ Broad Selection ✓ Worldwide Delivery ✓
www.starbike.com


